
In this post I explain how you can enable Viva Connections for Microsoft Teams. The complete process including which things you need to do before is very well documented in the product documentation. That’s why I’m not going into further details here.
Just one note, Viva should be planned very well, and Viva (Connections) should not be technical project. It must be an organizational and strategic project with sufficient change management, in my opinion, to be successful. A technical implementation of Viva does not make sense at all without change management to drive change and user adoption.

How to enable Viva Connections in Microsoft Teams?
When your Viva (Connection) preparations in your organization, on SharePoint Online and Yammer are done you can deploy Viva Connections to Microsoft Teams.
- Open the Teams Admin Center (TAC) and login https://admin.teams.microsoft.com
- Go to Teams Apps and Manage Apps
- Search for Viva
- Click on Viva Connections

- Allow Viva Connections

- Viva Connections is now enabled for your whole Teams Organization (it can be found in the Teams client app store. Please note that it can take some time till the change takes effect.)

- To deploy and pin the Viva Connections app on the Teams navigation bar for all users, go to Setup Policies
- Open the app setup policy which you want to use (depending on your deployment plan)

- Add Viva Connections as an installed app
- Add Viva Connections as a pinned app
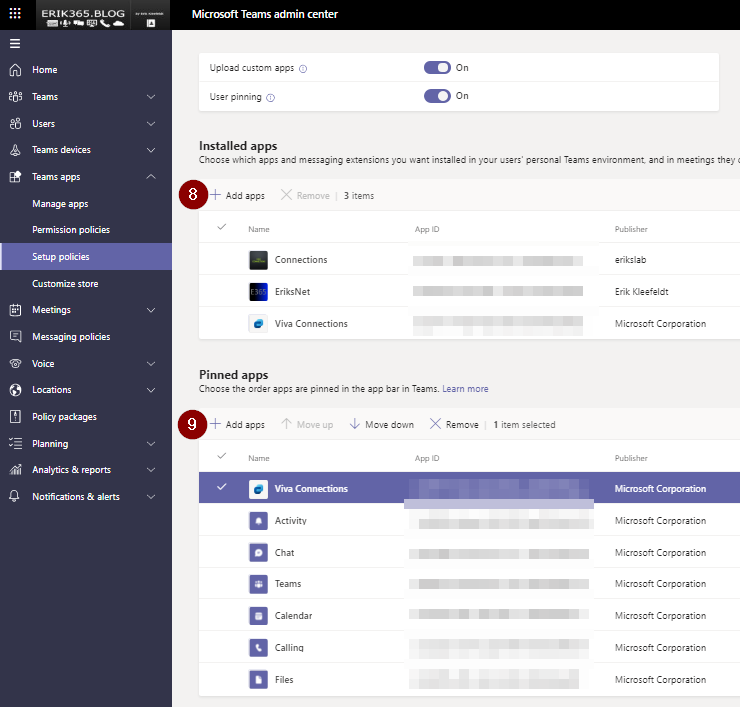
- Hit save to apply the change
- Assign the app setup policy (if you have custom ones) to the users which should get Viva Connections in Microsoft Teams
- Please note that it can take some time till the change takes effect.
- Inform users and tell them that Viva Connections is available


Comment / Kommentar verfassen